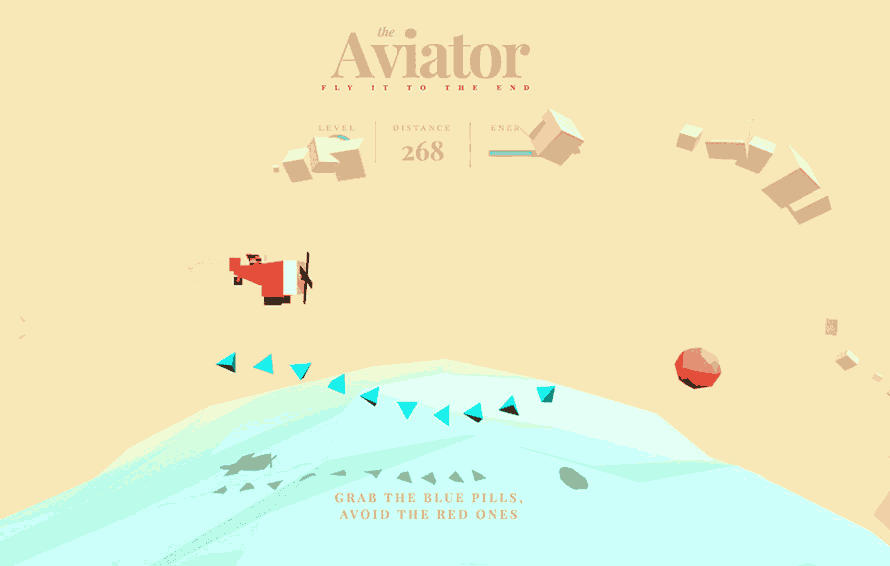
效果图:

描述说明:
今天,我们将使用Three.js创建一个简单的3D飞机,使WebGL更简单。由于GLSL的复杂性和语法,WebGL对许多开发人员来说是一个相当陌生的世界。但是通过Three.js,浏览器中的3D变得非常容易实现。
在本教程中,我们将创建一个简单的3D场景,并在两个主要部分中进行一些交互。
在第一部分,我们将解释Three.js的基础知识,以及如何建立一个非常简单的场景。
第二部分详细介绍了如何细化形状, 如何在场景的不同元素中添加一些气氛和更好的动作。
本教程的范围之外是整个游戏,但您可以下载并查看代码; 它包含许多有趣的附加部分,如碰撞,抓硬币和增加分数。
在本教程中,我们将重点介绍一些基本概念,使您可以使用Three.js开始WebGL的世界!
马上开始吧!
HTML和CSS
本教程主要使用Three.js库,这使得WebGL易于使用。
首先要做的是在你的HTML头文件中导入这个库:
<script type="text/javascript" src="js/three.js"></script>
然后你需要在HTML中添加一个容器元素来容纳渲染的场景:
<div id="world"></div>
您可以简单地将其设置为如下所示,以填充整个视口:
#world {
    position: absolute;
    width: 100%;
    height: 100%;
    overflow: hidden;
    background: linear-gradient(#e4e0ba, #f7d9aa);
}
正如你所看到的,背景有一个微妙的渐变,就像天空。
这就是标记和风格!
JavaScript
如果您有一些关于JavaScript的基本知识,Three.js非常易于使用。让我们来看看我们要实现的代码的不同部分。
调色板

在开始编写场景之前,我总是发现定义一个在整个项目中一致使用的调色板是非常有用的。对于这个项目,我们选择以下颜色:
var Colors = {
    red:0xf25346,
    white:0xd8d0d1,
    brown:0x59332e,
    pink:0xF5986E,
    brownDark:0x23190f,
    blue:0x68c3c0,
};
守则的结构
尽管JavaScript代码非常冗长,但其结构非常简单。我们需要创建的所有主要函数都放在init函数中:
window.addEventListener('load', init, false);

function init() {
    // set up the scene, the camera and the renderer
    createScene();

    // add the lights
    createLights();

    // add the objects
    createPlane();
    createSea();
    createSky();

    // start a loop that will update the objects' positions
    // and render the scene on each frame
    loop();
}
设置场景
要创建Three.js项目,我们至少需要以下内容:
一个场景:将其视为需要添加每个对象才能渲染的阶段相机:在这种情况下,我们将使用透视相机,但它也可能是一个正交相机。渲染器将使用WebGL显示所有场景。一个或多个物体渲染,在我们的例子中,我们将创建一个飞机,一个海洋和一个天空(一些云)一个或多个灯:也有不同类型的灯可用。在这个项目中,我们将主要使用一个半球光照的气氛和一个定向的光影。

场景,相机和渲染器是在createScene函数中创建的:
var scene,
        camera, fieldOfView, aspectRatio, nearPlane, farPlane, HEIGHT, WIDTH,
        renderer, container;

function createScene() {
    // Get the width and the height of the screen,
    // use them to set up the aspect ratio of the camera
    // and the size of the renderer.
    HEIGHT = window.innerHeight;
    WIDTH = window.innerWidth;

    // Create the scene
    scene = new THREE.Scene();

    // Add a fog effect to the scene; same color as the
    // background color used in the style sheet
    scene.fog = new THREE.Fog(0xf7d9aa, 100, 950);

    // Create the camera
    aspectRatio = WIDTH / HEIGHT;
    fieldOfView = 60;
    nearPlane = 1;
    farPlane = 10000;
    camera = new THREE.PerspectiveCamera(
        fieldOfView,
        aspectRatio,
        nearPlane,
        farPlane
        );

    // Set the position of the camera
    camera.position.x = 0;
    camera.position.z = 200;
    camera.position.y = 100;

    // Create the renderer
    renderer = new THREE.WebGLRenderer({
        // Allow transparency to show the gradient background
        // we defined in the CSS
        alpha: true,

        // Activate the anti-aliasing; this is less performant,
        // but, as our project is low-poly based, it should be fine :)
        antialias: true
    });

    // Define the size of the renderer; in this case,
    // it will fill the entire screen
    renderer.setSize(WIDTH, HEIGHT);

    // Enable shadow rendering
    renderer.shadowMap.enabled = true;

    // Add the DOM element of the renderer to the
    // container we created in the HTML
    container = document.getElementById('world');
    container.appendChild(renderer.domElement);

    // Listen to the screen: if the user resizes it
    // we have to update the camera and the renderer size
    window.addEventListener('resize', handleWindowResize, false);
}
由于屏幕尺寸可以改变,我们需要更新渲染器尺寸和相机长宽比:
function handleWindowResize() {
    // update height and width of the renderer and the camera
    HEIGHT = window.innerHeight;
    WIDTH = window.innerWidth;
    renderer.setSize(WIDTH, HEIGHT);
    camera.aspect = WIDTH / HEIGHT;
    camera.updateProjectionMatrix();
}
灯光
闪电当然是设置场景中最棘手的部分之一。灯光将设定整个场景的气氛,必须仔细确定。在这个项目的这一步,我们只是试图使闪电足够好,使物体可见。
var hemisphereLight, shadowLight;

function createLights() {
    // A hemisphere light is a gradient colored light;
    // the first parameter is the sky color, the second parameter is the ground color,
    // the third parameter is the intensity of the light
    hemisphereLight = new THREE.HemisphereLight(0xaaaaaa,0x000000, .9)

    // A directional light shines from a specific direction.
    // It acts like the sun, that means that all the rays produced are parallel.
    shadowLight = new THREE.DirectionalLight(0xffffff, .9);

    // Set the direction of the light
    shadowLight.position.set(150, 350, 350);

    // Allow shadow casting
    shadowLight.castShadow = true;

    // define the visible area of the projected shadow
    shadowLight.shadow.camera.left = -400;
    shadowLight.shadow.camera.right = 400;
    shadowLight.shadow.camera.top = 400;
    shadowLight.shadow.camera.bottom = -400;
    shadowLight.shadow.camera.near = 1;
    shadowLight.shadow.camera.far = 1000;

    // define the resolution of the shadow; the higher the better,
    // but also the more expensive and less performant
    shadowLight.shadow.mapSize.width = 2048;
    shadowLight.shadow.mapSize.height = 2048;

    // to activate the lights, just add them to the scene
    scene.add(hemisphereLight);
    scene.add(shadowLight);
}
正如您在这里所看到的, 许多参数用于创建光源。不要犹豫, 试验的颜色, 强度和数量的灯;你会发现有趣的情绪和氛围为你的场景,,并感觉如何调整他们的需求。
使用Three.js 创建对象
如果您对3D建模软件感到满意,您可以在那里创建对象,并将其导入到Three.js项目中。本教程不会涉及这个解决方案,但是我们将使用Three.js中提供的基元来创建对象,以更好地理解它们的工作原理。
Three.js已经有了大量的立方体,球体,圆环体,圆柱体和平面等现成的图元。
对于我们的项目,我们要创建的所有对象只是这些基元的组合。这非常适合低聚风格,它将使我们不必在3D软件中对对象进行建模。
一个简单的海洋
让我们从创造海洋开始,因为它是我们必须处理的最简单的对象。为了简单起见,我们将把大海说成是一个放在屏幕底部的简单的蓝色圆柱体。稍后我们将深入探讨如何改善这种形状。
接下来,让大海看起来更有吸引力,波浪更逼真:
// First let's define a Sea object :
Sea = function(){

    // create the geometry (shape) of the cylinder;
    // the parameters are:
    // radius top, radius bottom, height, number of segments on the radius, number of segments vertically
    var geom = new THREE.CylinderGeometry(600,600,800,40,10);

    // rotate the geometry on the x axis
    geom.applyMatrix(new THREE.Matrix4().makeRotationX(-Math.PI/2));

    // create the material
    var mat = new THREE.MeshPhongMaterial({
        color:Colors.blue,
        transparent:true,
        opacity:.6,
        shading:THREE.FlatShading,
    });

    // To create an object in Three.js, we have to create a mesh
    // which is a combination of a geometry and some material
    this.mesh = new THREE.Mesh(geom, mat);

    // Allow the sea to receive shadows
    this.mesh.receiveShadow = true;
}

// Instantiate the sea and add it to the scene:

var sea;

function createSea(){
    sea = new Sea();

    // push it a little bit at the bottom of the scene
    sea.mesh.position.y = -600;

    // add the mesh of the sea to the scene
    scene.add(sea.mesh);
}
让我们总结一下为了创建一个对象我们需要什么。我们要
创建几何图形
创建材料
把它们传给网格
将网格添加到我们的场景中
通过这些基本步骤, 我们可以创建许多不同类型的原始对象。现在, 如果我们结合起来, 我们可以创建更复杂的形状。
在下面的步骤中, 我们将学习如何准确地做到这一点。
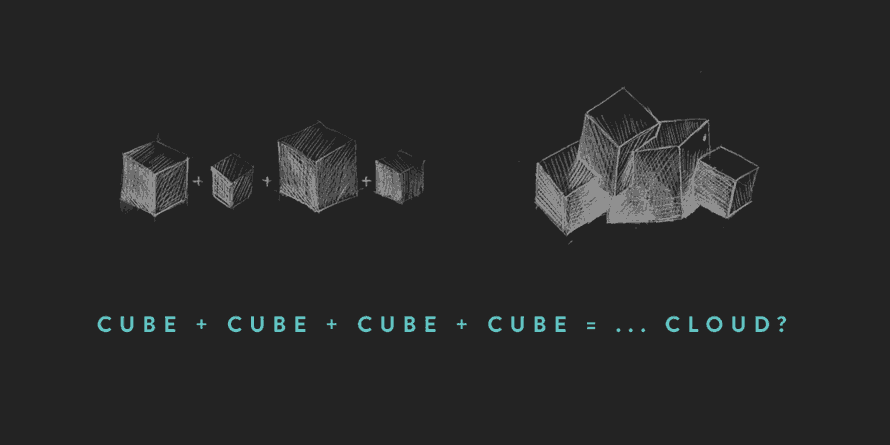
组合简单的多维数据集以创建复杂形状
云有点复杂,因为它们是随机组合成一个形状的多个立方体。
Cloud = function(){
    // Create an empty container that will hold the different parts of the cloud
    this.mesh = new THREE.Object3D();

    // create a cube geometry;
    // this shape will be duplicated to create the cloud
    var geom = new THREE.BoxGeometry(20,20,20);

    // create a material; a simple white material will do the trick
    var mat = new THREE.MeshPhongMaterial({
        color:Colors.white,
    });

    // duplicate the geometry a random number of times
    var nBlocs = 3+Math.floor(Math.random()*3);
    for (var i=0; i<nBlocs; i++ ){

        // create the mesh by cloning the geometry
        var m = new THREE.Mesh(geom, mat);

        // set the position and the rotation of each cube randomly
        m.position.x = i*15;
        m.position.y = Math.random()*10;
        m.position.z = Math.random()*10;
        m.rotation.z = Math.random()*Math.PI*2;
        m.rotation.y = Math.random()*Math.PI*2;

        // set the size of the cube randomly
        var s = .1 + Math.random()*.9;
        m.scale.set(s,s,s);

        // allow each cube to cast and to receive shadows
        m.castShadow = true;
        m.receiveShadow = true;

        // add the cube to the container we first created
        this.mesh.add(m);
    }
}
现在我们有一个云,我们将使用它来复制整个天空,并将它放置在z轴周围的任意位置:
// Define a Sky Object
Sky = function(){
    // Create an empty container
    this.mesh = new THREE.Object3D();

    // choose a number of clouds to be scattered in the sky
    this.nClouds = 20;

    // To distribute the clouds consistently,
    // we need to place them according to a uniform angle
    var stepAngle = Math.PI*2 / this.nClouds;

    // create the clouds
    for(var i=0; i<this.nClouds; i++){
        var c = new Cloud();

        // set the rotation and the position of each cloud;
        // for that we use a bit of trigonometry
        var a = stepAngle*i; // this is the final angle of the cloud
        var h = 750 + Math.random()*200; // this is the distance between the center of the axis and the cloud itself

        // Trigonometry!!! I hope you remember what you've learned in Math :)
        // in case you don't:
        // we are simply converting polar coordinates (angle, distance) into Cartesian coordinates (x, y)
        c.mesh.position.y = Math.sin(a)*h;
        c.mesh.position.x = Math.cos(a)*h;

        // rotate the cloud according to its position
        c.mesh.rotation.z = a + Math.PI/2;

        // for a better result, we position the clouds
        // at random depths inside of the scene
        c.mesh.position.z = -400-Math.random()*400;

        // we also set a random scale for each cloud
        var s = 1+Math.random()*2;
        c.mesh.scale.set(s,s,s);

        // do not forget to add the mesh of each cloud in the scene
        this.mesh.add(c.mesh);
    }
}

// Now we instantiate the sky and push its center a bit
// towards the bottom of the screen

var sky;

function createSky(){
    sky = new Sky();
    sky.mesh.position.y = -600;
    scene.add(sky.mesh);
}
更复杂:创建飞机
坏消息是创建飞机的代码比较长和复杂。但好消息是,我们已经学会了所有我们需要知道的事情!这完全是关于组合和封装形状。

var AirPlane = function() {

    this.mesh = new THREE.Object3D();

    // Create the cabin
    var geomCockpit = new THREE.BoxGeometry(60,50,50,1,1,1);
    var matCockpit = new THREE.MeshPhongMaterial({color:Colors.red, shading:THREE.FlatShading});
    var cockpit = new THREE.Mesh(geomCockpit, matCockpit);
    cockpit.castShadow = true;
    cockpit.receiveShadow = true;
    this.mesh.add(cockpit);

    // Create the engine
    var geomEngine = new THREE.BoxGeometry(20,50,50,1,1,1);
    var matEngine = new THREE.MeshPhongMaterial({color:Colors.white, shading:THREE.FlatShading});
    var engine = new THREE.Mesh(geomEngine, matEngine);
    engine.position.x = 40;
    engine.castShadow = true;
    engine.receiveShadow = true;
    this.mesh.add(engine);

    // Create the tail
    var geomTailPlane = new THREE.BoxGeometry(15,20,5,1,1,1);
    var matTailPlane = new THREE.MeshPhongMaterial({color:Colors.red, shading:THREE.FlatShading});
    var tailPlane = new THREE.Mesh(geomTailPlane, matTailPlane);
    tailPlane.position.set(-35,25,0);
    tailPlane.castShadow = true;
    tailPlane.receiveShadow = true;
    this.mesh.add(tailPlane);

    // Create the wing
    var geomSideWing = new THREE.BoxGeometry(40,8,150,1,1,1);
    var matSideWing = new THREE.MeshPhongMaterial({color:Colors.red, shading:THREE.FlatShading});
    var sideWing = new THREE.Mesh(geomSideWing, matSideWing);
    sideWing.castShadow = true;
    sideWing.receiveShadow = true;
    this.mesh.add(sideWing);

    // propeller
    var geomPropeller = new THREE.BoxGeometry(20,10,10,1,1,1);
    var matPropeller = new THREE.MeshPhongMaterial({color:Colors.brown, shading:THREE.FlatShading});
    this.propeller = new THREE.Mesh(geomPropeller, matPropeller);
    this.propeller.castShadow = true;
    this.propeller.receiveShadow = true;

    // blades
    var geomBlade = new THREE.BoxGeometry(1,100,20,1,1,1);
    var matBlade = new THREE.MeshPhongMaterial({color:Colors.brownDark, shading:THREE.FlatShading});

    var blade = new THREE.Mesh(geomBlade, matBlade);
    blade.position.set(8,0,0);
    blade.castShadow = true;
    blade.receiveShadow = true;
    this.propeller.add(blade);
    this.propeller.position.set(50,0,0);
    this.mesh.add(this.propeller);
};
这架飞机看起来很简单,对吧?别担心,稍后我们会看到如何改进飞机的形状,使其看起来更好!
现在,我们可以实例化飞机并将其添加到我们的场景中:
var airplane;

function createPlane(){
    airplane = new AirPlane();
    airplane.mesh.scale.set(.25,.25,.25);
    airplane.mesh.position.y = 100;
    scene.add(airplane.mesh);
}
渲染
我们创建了一些对象,并将它们添加到我们的场景中。但是如果你试图运行游戏,你将无法看到任何东西!那是因为我们还得渲染这个场景。我们可以简单地通过添加下面这行代码来做到这一点:
renderer.render(scene, camera);
动画
让我们通过使飞机的螺旋桨旋转,旋转海洋和云彩,为我们的生活带来一些生机。
为此,我们将需要一个无限循环:
function loop(){
    // Rotate the propeller, the sea and the sky
    airplane.propeller.rotation.x += 0.3;
    sea.mesh.rotation.z += .005;
    sky.mesh.rotation.z += .01;

    // render the scene
    renderer.render(scene, camera);

    // call the loop function again
    requestAnimationFrame(loop);
}
正如你所看到的,我们已经把调用的render方法移到了loop函数中。这是因为我们对一个对象所做的每一个改变都需要再次渲染。
跟随鼠标: 添加交互
在这一刻,我们可以看到我们的飞机放置在现场的中心。我们接下来要做的就是让它跟随鼠标的移动。
一旦文档被加载,我们需要添加一个监听器到文档,检查鼠标是否在移动。为此,我们将修改init函数,如下所示:
function init(event){
    createScene();
    createLights();
    createPlane();
    createSea();
    createSky();

    //add the listener
    document.addEventListener('mousemove', handleMouseMove, false);

    loop();
}
另外,我们将创建一个新的函数来处理mousemove事件:
var mousePos={x:0, y:0};

// now handle the mousemove event

function handleMouseMove(event) {

    // here we are converting the mouse position value received
    // to a normalized value varying between -1 and 1;
    // this is the formula for the horizontal axis:

    var tx = -1 + (event.clientX / WIDTH)*2;

    // for the vertical axis, we need to inverse the formula
    // because the 2D y-axis goes the opposite direction of the 3D y-axis

    var ty = 1 - (event.clientY / HEIGHT)*2;
    mousePos = {x:tx, y:ty};

}
现在我们有一个标准化的鼠标的x和y位置,我们可以正确地移动飞机。
我们需要修改循环并添加一个新的功能来更新飞机:
function loop(){
    sea.mesh.rotation.z += .005;
    sky.mesh.rotation.z += .01;

    // update the plane on each frame
    updatePlane();

    renderer.render(scene, camera);
    requestAnimationFrame(loop);
}

function updatePlane(){

    // let's move the airplane between -100 and 100 on the horizontal axis,
    // and between 25 and 175 on the vertical axis,
    // depending on the mouse position which ranges between -1 and 1 on both axes;
    // to achieve that we use a normalize function (see below)

    var targetX = normalize(mousePos.x, -1, 1, -100, 100);
    var targetY = normalize(mousePos.y, -1, 1, 25, 175);

    // update the airplane's position
    airplane.mesh.position.y = targetY;
    airplane.mesh.position.x = targetX;
    airplane.propeller.rotation.x += 0.3;
}

function normalize(v,vmin,vmax,tmin, tmax){

    var nv = Math.max(Math.min(v,vmax), vmin);
    var dv = vmax-vmin;
    var pc = (nv-vmin)/dv;
    var dt = tmax-tmin;
    var tv = tmin + (pc*dt);
    return tv;

}恭喜,用这个,你已经使飞机跟随你的鼠标移动!看看我们迄今取得的成绩:第1部分演示
(几乎)完成!
正如你所看到的,Three.js极大地帮助创建WebGL内容。您不需要知道很多设置场景并渲染一些自定义对象。到目前为止,您已经学习了一些基本概念,通过调整一些参数,例如光强度,雾的颜色和对象的大小,您就可以开始掌握它了。也许你现在对创建一些新的对象感到舒服?
如果您想深入了解一些更深入的技术,请继续阅读,以了解如何改进3D场景,使飞机更平稳地移动,并模拟海面上的低波浪效应。
更酷的飞机!
嗯, 我们以前创建的飞机是非常基本的。我们现在知道如何创建对象并将它们组合在一起, 但我们仍然需要学习如何修改一个原始元素, 使其更适合我们的需要。
例如, 可以通过移动其顶点来修改多维数据集。在我们的情况下, 我们想让它看起来更像一个驾驶舱。
让我们来看看飞机的驾驶舱部分, 看看我们如何使它在后面变窄:

// Cockpit

var geomCockpit = new THREE.BoxGeometry(80,50,50,1,1,1);
var matCockpit = new THREE.MeshPhongMaterial({color:Colors.red, shading:THREE.FlatShading});

// we can access a specific vertex of a shape through
// the vertices array, and then move its x, y and z property:
geomCockpit.vertices[4].y-=10;
geomCockpit.vertices[4].z+=20;
geomCockpit.vertices[5].y-=10;
geomCockpit.vertices[5].z-=20;
geomCockpit.vertices[6].y+=30;
geomCockpit.vertices[6].z+=20;
geomCockpit.vertices[7].y+=30;
geomCockpit.vertices[7].z-=20;

var cockpit = new THREE.Mesh(geomCockpit, matCockpit);
cockpit.castShadow = true;
cockpit.receiveShadow = true;
this.mesh.add(cockpit);
这是一个如何操作一个形状来调整我们的需求的例子。
如果你看看飞机的完整代码,你会看到更多的物体,如窗户和更好看的螺旋桨。没什么复杂的 尝试调整值以获得感觉,并制作您自己的飞机版本。
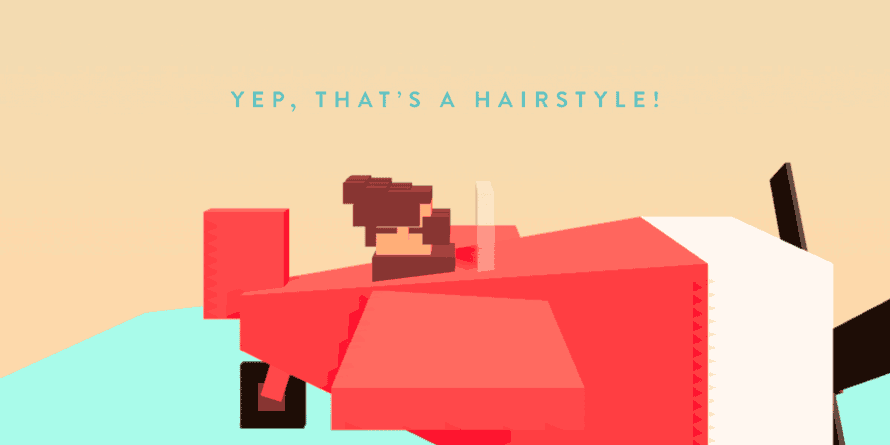
但是谁在飞机上飞行?
给我们的飞机添加一个飞行员就像添加几个盒子一样简单。
但是,我们不只是想要任何飞行员,我们想要一个凉爽的飞行员,风吹头发动画!这似乎是一个复杂的努力,但由于我们正在一个低聚场景工作,这变得更容易的任务。试图创造性地模拟飘飘的头发只有几个盒子也将给你的场景一个独特的触摸。

我们来看看它是如何编码的:
var Pilot = function(){
    this.mesh = new THREE.Object3D();
    this.mesh.name = "pilot";

    // angleHairs is a property used to animate the hair later
    this.angleHairs=0;

    // Body of the pilot
    var bodyGeom = new THREE.BoxGeometry(15,15,15);
    var bodyMat = new THREE.MeshPhongMaterial({color:Colors.brown, shading:THREE.FlatShading});
    var body = new THREE.Mesh(bodyGeom, bodyMat);
    body.position.set(2,-12,0);
    this.mesh.add(body);

    // Face of the pilot
    var faceGeom = new THREE.BoxGeometry(10,10,10);
    var faceMat = new THREE.MeshLambertMaterial({color:Colors.pink});
    var face = new THREE.Mesh(faceGeom, faceMat);
    this.mesh.add(face);

    // Hair element
    var hairGeom = new THREE.BoxGeometry(4,4,4);
    var hairMat = new THREE.MeshLambertMaterial({color:Colors.brown});
    var hair = new THREE.Mesh(hairGeom, hairMat);
    // Align the shape of the hair to its bottom boundary, that will make it easier to scale.
    hair.geometry.applyMatrix(new THREE.Matrix4().makeTranslation(0,2,0));

    // create a container for the hair
    var hairs = new THREE.Object3D();

    // create a container for the hairs at the top
    // of the head (the ones that will be animated)
    this.hairsTop = new THREE.Object3D();

    // create the hairs at the top of the head
    // and position them on a 3 x 4 grid
    for (var i=0; i<12; i++){
        var h = hair.clone();
        var col = i%3;
        var row = Math.floor(i/3);
        var startPosZ = -4;
        var startPosX = -4;
        h.position.set(startPosX + row*4, 0, startPosZ + col*4);
        this.hairsTop.add(h);
    }
    hairs.add(this.hairsTop);

    // create the hairs at the side of the face
    var hairSideGeom = new THREE.BoxGeometry(12,4,2);
    hairSideGeom.applyMatrix(new THREE.Matrix4().makeTranslation(-6,0,0));
    var hairSideR = new THREE.Mesh(hairSideGeom, hairMat);
    var hairSideL = hairSideR.clone();
    hairSideR.position.set(8,-2,6);
    hairSideL.position.set(8,-2,-6);
    hairs.add(hairSideR);
    hairs.add(hairSideL);

    // create the hairs at the back of the head
    var hairBackGeom = new THREE.BoxGeometry(2,8,10);
    var hairBack = new THREE.Mesh(hairBackGeom, hairMat);
    hairBack.position.set(-1,-4,0)
    hairs.add(hairBack);
    hairs.position.set(-5,5,0);

    this.mesh.add(hairs);

    var glassGeom = new THREE.BoxGeometry(5,5,5);
    var glassMat = new THREE.MeshLambertMaterial({color:Colors.brown});
    var glassR = new THREE.Mesh(glassGeom,glassMat);
    glassR.position.set(6,0,3);
    var glassL = glassR.clone();
    glassL.position.z = -glassR.position.z

    var glassAGeom = new THREE.BoxGeometry(11,1,11);
    var glassA = new THREE.Mesh(glassAGeom, glassMat);
    this.mesh.add(glassR);
    this.mesh.add(glassL);
    this.mesh.add(glassA);

    var earGeom = new THREE.BoxGeometry(2,3,2);
    var earL = new THREE.Mesh(earGeom,faceMat);
    earL.position.set(0,0,-6);
    var earR = earL.clone();
    earR.position.set(0,0,6);
    this.mesh.add(earL);
    this.mesh.add(earR);
}

// move the hair
Pilot.prototype.updateHairs = function(){

    // get the hair
    var hairs = this.hairsTop.children;

    // update them according to the angle angleHairs
    var l = hairs.length;
    for (var i=0; i<l; i++){
        var h = hairs[i];
        // each hair element will scale on cyclical basis between 75% and 100% of its original size
        h.scale.y = .75 + Math.cos(this.angleHairs+i/3)*.25;
    }
    // increment the angle for the next frame
    this.angleHairs += 0.16;
}
现在让头发移动,只需要将这一行添加到循环功能:
airplane.pilot.updateHairs();
制造波浪
你可能已经注意到,大海看起来并不像一个大海,而更像是一个被压路机压平的表面。
它需要一些波。这可以通过结合我们以前使用的两种技术来完成:
像我们在飞机驾驶舱一样操作几何图形的顶点。
像我们那样对每个顶点应用循环移动来移动飞行员的头发。
为了制造波浪,我们将围绕其初始位置旋转圆柱体的每个顶点,通过给予它随机的速度旋转和随机距离(旋转的半径)。对不起,你也需要在这里使用一些三角函数!

让我们来修改一下海:
Sea = function() {
    var geom = new THREE.CylinderGeometry(600, 600, 800, 40, 10);
    geom.applyMatrix(new THREE.Matrix4().makeRotationX(-Math.PI / 2));

    // important: by merging vertices we ensure the continuity of the waves
    geom.mergeVertices();

    // get the vertices
    var l = geom.vertices.length;

    // create an array to store new data associated to each vertex
    this.waves = [];

    for (var i = 0; i < l; i++) {
        // get each vertex
        var v = geom.vertices[i];

        // store some data associated to it
        this.waves.push({
            y: v.y,
            x: v.x,
            z: v.z,
            // a random angle
            ang: Math.random() * Math.PI * 2,
            // a random distance
            amp: 5 + Math.random() * 15,
            // a random speed between 0.016 and 0.048 radians / frame
            speed: 0.016 + Math.random() * 0.032
        });
    };
    var mat = new THREE.MeshPhongMaterial({
        color: Colors.blue,
        transparent: true,
        opacity: .8,
        shading: THREE.FlatShading,
    });

    this.mesh = new THREE.Mesh(geom, mat);
    this.mesh.receiveShadow = true;

}

// now we create the function that will be called in each frame
// to update the position of the vertices to simulate the waves

Sea.prototype.moveWaves = function() {

    // get the vertices
    var verts = this.mesh.geometry.vertices;
    var l = verts.length;

    for (var i = 0; i < l; i++) {
        var v = verts[i];

        // get the data associated to it
        var vprops = this.waves[i];

        // update the position of the vertex
        v.x = vprops.x + Math.cos(vprops.ang) * vprops.amp;
        v.y = vprops.y + Math.sin(vprops.ang) * vprops.amp;

        // increment the angle for the next frame
        vprops.ang += vprops.speed;

    }

    // Tell the renderer that the geometry of the sea has changed.
    // In fact, in order to maintain the best level of performance,
    // three.js caches the geometries and ignores any changes
    // unless we add this line
    this.mesh.geometry.verticesNeedUpdate = true;

    sea.mesh.rotation.z += .005;
}
就像我们为飞行员的头发所做的那样,我们在循环函数中添加了这一行:
sea.moveWaves();
现在,享受海浪!
改善现场照明
在本教程的第一部分中,我们已经设置了一些照明。但是我们想给场景增添一个更好的心情,让阴影变得柔和。为了达到这个目标,我们要使用环境光。
在createLights函数中,我们添加以下几行:
// an ambient light modifies the global color of a scene and makes the shadows softer
ambientLight = new THREE.AmbientLight(0xdc8874, .5);
scene.add(ambientLight);
不要犹豫,玩的环境光的颜色和强度; 它会为您的场景添加独特的触感。
更顺畅的飞行
我们的小飞机已经跟随了鼠标的移动。但它并不像真正的飞行。当飞机改变其高度时,如果它更平稳地改变其位置和方向将是很好的。在本教程的最后一部分,我们将完全实现这一点。
一个简单的方法是通过在每一帧中添加一小部分的距离来将它移动到一个目标。
基本上,代码看起来像这样(这是一个通用公式,不要立即添加到你的代码中):
currentPosition += (finalPosition - currentPosition)*fraction;
为了更逼真,飞机的旋转也可以根据运动的方向而改变。如果飞机上升很快,它应该快速逆时针旋转。如果飞机缓慢下降,它应该顺时针方向缓慢旋转。为了达到这个目的,我们可以简单地将比例旋转值分配给目标和飞机位置之间的剩余距离。
在我们的代码中,updatePlane函数需要如下所示:
function updatePlane(){
    var targetY = normalize(mousePos.y,-.75,.75,25, 175);
    var targetX = normalize(mousePos.x,-.75,.75,-100, 100);

    // Move the plane at each frame by adding a fraction of the remaining distance
    airplane.mesh.position.y += (targetY-airplane.mesh.position.y)*0.1;

    // Rotate the plane proportionally to the remaining distance
    airplane.mesh.rotation.z = (targetY-airplane.mesh.position.y)*0.0128;
    airplane.mesh.rotation.x = (airplane.mesh.position.y-targetY)*0.0064;

    airplane.propeller.rotation.x += 0.3;
}
现在飞机运动看起来更加优雅和现实。通过改变分数值,可以使飞机响应速度更快或更慢的鼠标移动。试试看看它是如何改变的。
看看我们现场的最后阶段:第2部分的演示
做得好!
然后去哪儿?
如果你一直沿着这里走,你已经在Three.js中学习了一些基本的,但是多功能的技术,这将使你能够创建你的第一个场景。您现在知道如何从基元创建对象,如何为它们设置动画以及如何设置场景的光照。你也看到了如何改善你的物体的外观和运动,以及如何调整环境光线。
下一步,因为它涉及一些更复杂的技术,所以不在本教程的范围内,那就是实现一个游戏,其中碰撞,点收集和水平控制等概念发生。下载代码并查看实现; 你会看到迄今为止学到的所有概念,还有一些你可以探索和发挥的先进概念。请注意,该游戏已针对桌面使用进行了优化。
希望本教程能帮助您熟悉Three.js,并激励您自行实施。让我知道你的创作,我很想看看你做什么!
转载请注明来源地址:小川编程 » https://www.youhutong.com/index.php/article/index/430.html
1、本站发布的内容仅限用于学习和研究目的.请勿用于商业或非法用途,下载后请24小时内删除。
2、本站所有内容均不能保证其完整性,不能接受请勿购买或下载,如需完整程序,请去其官方购买正版使用
3、本站联系方式Email:admin@youhutong.com ,收到邮件会第一时间处理。
4、如侵犯到任何版权问题,请立即告知本站(立即在线告知),本站将及时删除并致以最深的歉意